
Hello everyone ,
Today we will be doing a realistic Nose in Watercolors . So, stay calm and follow the steps given below.
ART SUPPLIES USED ARE AS FOLLOWS :
* Windsor and Newton Watercolors.
* Watercolor Brushes.
* WaterColor Paper 220GSM.
* Camel Photo Ink Colors.
As we have already uploaded a nose shading tutorial , I am very sure you will be able to draw the basic structure of nose and also the details where there is highlights required for easy understanding .So, let’s begin this tutorial by choosing colors for the painting.

Firstly , start drawing the basic structure of nose in right proportion with marking the areas of highlights ,light and dark tones as they will help you during further steps .
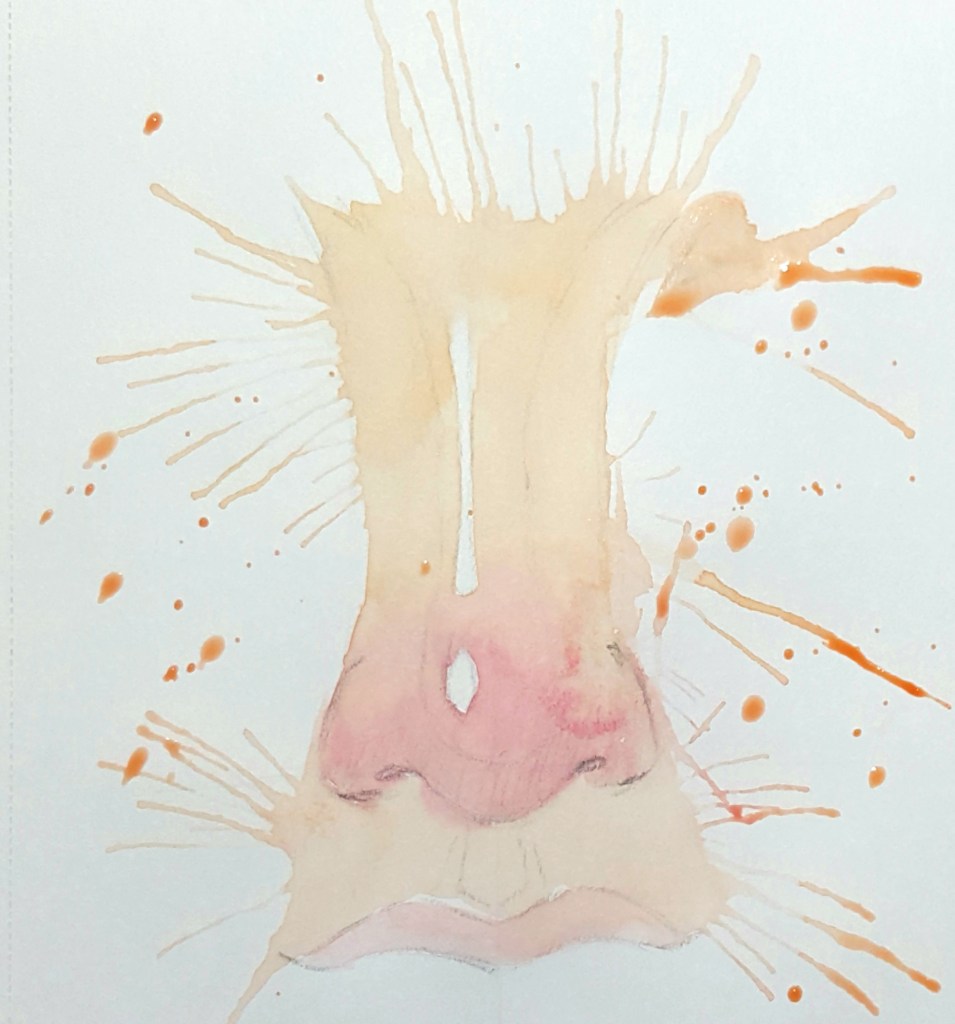
Moving ahead now let’s begin with Watercolors , for which first mix a little bit of yellow ,orange and brown to get the right shade . And start giving your first light shade to the nose , remember to leave the area of highlights and understand the structure when painting Always start painting from up.and slowly go down .
Once you finish the first wash you can simultaneously start randomly splashing some paint near the painting which is very optional. You may also start painting in pink color the lips .

As you finish your first wash , add some more color to your brush and slowly give your second wash to the structure. In this wash remember to add shadow portion on the sides by using a darker tone and also adding a hint of pink color to the pallete. As you move downward and approach the area around the nostrils remember to keep you strokes in such manner that is helps showcasing the curved edges of it. Start adding the pink color along with the skin tone around the nostrils and also just above the lips. Once an initial layer is given to it we will now proceed to the third wash where minor details will be covered.
In the third wash, add the darker tones on areas of shadow and also try and give the details to the round portion of the nose and nostrils with the darker tone. There are few places where you will also have to give the darkest tone such as the nostrils, below the nose , curve of the round portion of the nose, the areas where the nose merges with the cheeks. These are the small details to remember as they give it a realistic look .
So, I hope you all have enjoyed doing this tutorial
