
Watercolor wash techniques :
Hello everyone, today we are here with few watercolor techniques tutorial for every beginner. In which we will be learning techniques which includes how to control the flow of the different watercolors to give it a natural effect , gradation techniques for background of any silhouette or any painting you wish thus giving it a greater depth and merging effect of the beautiful colors.
ART SUPPLIES USED ARE AS FOLLOWS :
* Windsor and Newton Watercolors.
*Round Graduate Daler Rowney Brushes.
*Camel Photo Ink
*Handmade Paper / 220GSM watercolor sketch book.
1. COLOR FLOW TOP TO BOTTOM
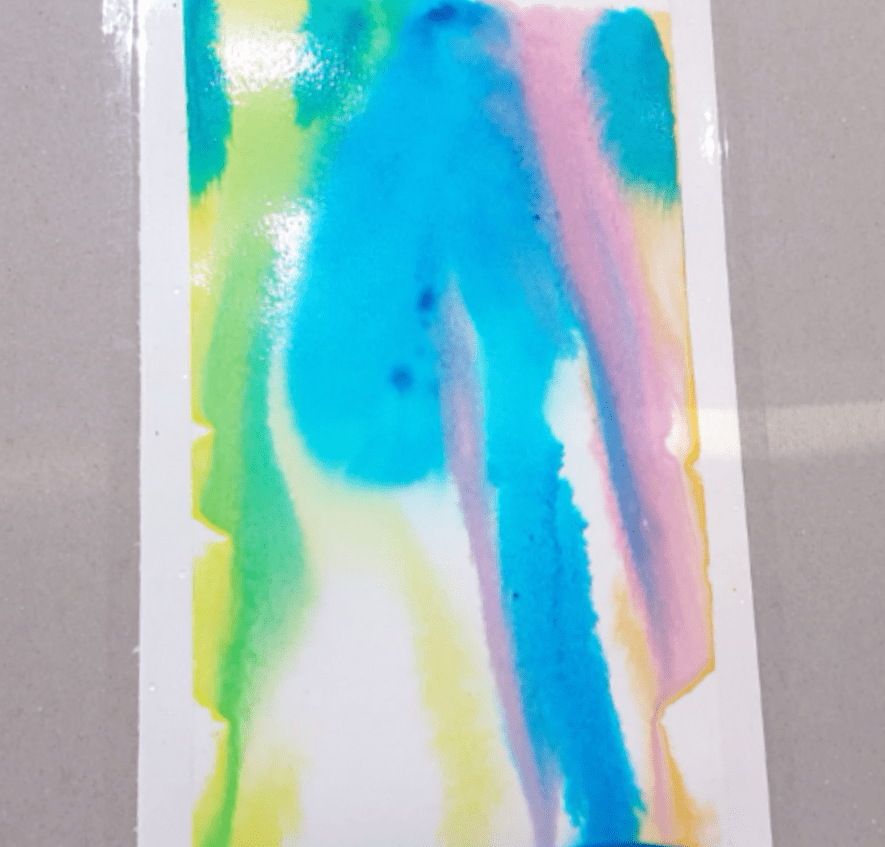
For the first technique which includes managing natural flow of the colors. It’s one of the easy techniques wherein we let the gravity do all the work and just colors merge beautifully in each other.
For this as you hold the paper in slanting position , first give a water wash to the paper where you take enough water in your brush to wet your paper through out .As you do this immediately take good amount of color in your brush and just press your brush in the paper where you want the color to be . Remember to keep your hand light and not too stiff. As you do it you will see the color beautifully moves in the direction of gravity and gives you a flow, slowly now add your selected colors to the places you wish and let the gravity do its job. You can give slight direction to the flow if you want and also see the beautiful merger of two or more colors on the paper as it also give you different shades if allowed to flow naturally (or you may add color as per your wish of dark or light shade ).
So this is the first technique of wash in watercolors : the flow management of flow of different colors on the paper normally used to give natural merging effect in watercolor paintings.
2. LIGHT TO DARK GRADIATION

Our second technique is gradation technique which is used for giving background effect to the paintings specially when you are showing sunset or scenery or even in the silhouette paintings. It can be monochrome or with different colors , technique remains the same .
For the above technique , we always go from the light to dark tones . As shown in the first painting you can see that I have used blue color which gives us the sky effect and the second one is for different colors you wish to use as background in your paintings.
For this first take good amount of water in your brush go horizontal on the paper giving the lightest tone first after which slowly add color and continue going horizontally .Let the color merge in its natural way .Just keep mind to increase the amount of color as you go down to give the color gradient as shown in above image. Keep going and at the end you will see you have the darkest shade . Similarly we can also do with different colors only instead here we have to change the color and keep following the same technique and let the color merge wherever you want them too. Hope you are enjoying the basic techniques . Practice will make your paintings look very natural as your get the way the water and color works on the watercolor paper .
3. CIRCULAR GRADIATION
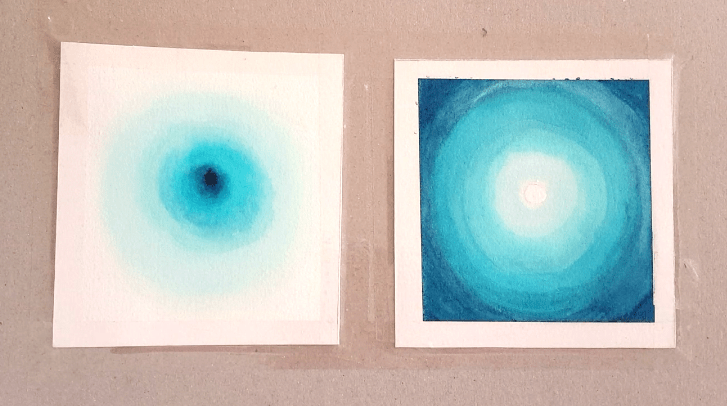
This technique is called the circular gradation technique which helps us give depth to the painting. This technique requires good practice as to how much water :color ratio is required .But don’t worry , above two techniques will help you sail through easily.
For the circular gradation technique , we again start with light to dark tones but in circular fashion. First we start front the place where we want the lightest tone so the center most part, where we just use water and make a circular stroke and gradually then we start adding color in circular strokes one by one to give it gradation of light to dark tones .
It’s very similar to above technique just requires circular strokes to give it depth effect.
So, friends here we are with the watercolor wash techniques for beginners where we have demonstrated how to control flow and and color merging, giving us natural effects.
Hope you all enjoyed .
