
HOW TO DRAW AN EYE USING WATERCOLORS
In today’s tutorial ,we will be learning to draw an eye using watercolors.We have already learnt the how to draw and shade a realistic eye ,so tiny details of its structure and importance of the shadows as well as places of darker and lighter tones are pretty much explained .So, friends lets grab some watercolors and begin with the tutorial .
ART SUPPLIES USED ARE AS FOLLOWS :
*Watercolor Paper 220 GSM
* Windsor and Newton Watercolors.
* Watercolor Brushes
*Erase
*Ink colors
*STEP BY STEP TUTORIAL**

We all have learnt how to draw and shade a realistic eye in previous tutorial .Today we will be ding the same but instead of sketching we will be painting using watercolors.So, firstly draw an eye as shown in the above figure using a light pencil .Always mark the areas in which you need to put in darker tones and places where you need to leave the white of the paper ,for your ease of understanding.Once you have done that we can start using the watercolors .
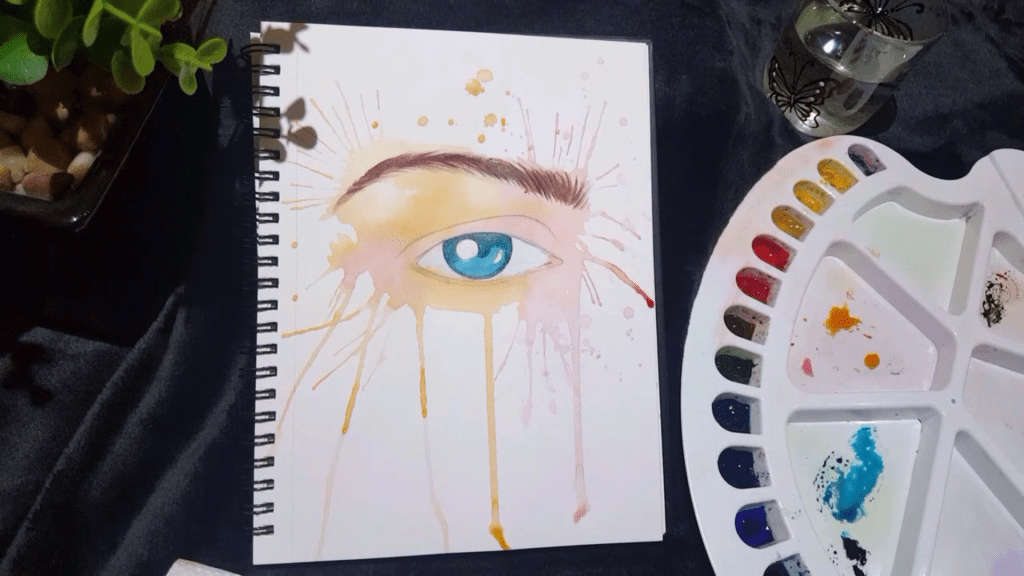
In this painting we are going to use watercolors and ink colors for added brightness .In order to get the splash effect lets first take some violet and orange color and add it in up to down fashion. Use less of color and more of water when you are using the colors. Let the colors flow in downwards direction and you may direct the flow according to your wish by blowing the color drop when it is trickling downwards using a plastic straw.Faintly color the the area near the eye also with the help of a brush as shown above.Once your color near the eyebrows has dried you can start giving the strokes for eyebrow hair with brown color.Similarly ,now we also start coloring the eye ball with blue color leaving the highlights .Remember the areas of darker tones and that of the lighter tones.
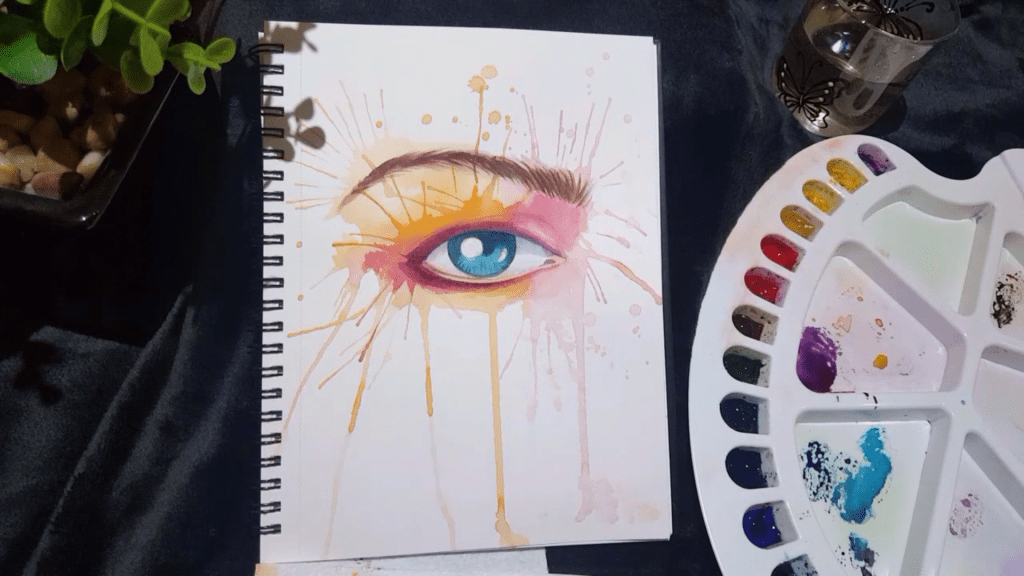
Now moving on to the second wash which will make your painting a little more brighter than your first wash.Once your first wash has completely dried then take some more of orange color and start adding the splashes again and directing the flow as before .Similarly ,you may also start adding the violet color and use the same technique to get the splash effect.The places to now concentrate are the areas near the eye where you need to be careful to add darker tones along with the highlighting the areas like the eye waterline area and the borders of the eye where the skin folds .
Further completing the painting by finishing the third wash where you add more of the color than water to the places where you wish to make brighter.Also using a thin brush add thin uniform strokes representing the eyebrow hair and adding small details of darker tone to the eyeball too.

Above is closeup view of how the colors should be added inside the eye to give us a 3D effect.The main trick here in this painting is to learn how to mix colors and understand the details we require for more realistic view.So, friend , I hope you enjoyed the tutorial ,looking forward hearing from you all as to how the painting turned out through mail .
