
HOW TO DO REALISTIC EYE SHADING
In today’s sketching tutorial we will be learning how to draw and shade an eye in the most realistic way possible.
The essence of shading ,rendering and light effect are going to be demonstrated here.Hope ,you all like it .
ART SUPPLIES USED ARE AS FOLLOWS :
* Sketching Pencil set
*Paper
*Erase
**DRAWING Snowman STEP BY STEP **
Let’s begin with the sketching , initially you can use any HB Pencil you like .After getting the tones right and you understand the technique you can always start using different sketching pencils. Pencil sketching primarily involves tones light,medium and dark depending on the object you are creating with respect to all the light source and reflections. So, once you know how much pressure to put for each tone you will surely master it soon.

Though it looks a little difficult , just follow step by step and you will surely get it right .We will first draw an eye ,for which we will use certain reference lines to make it proportionate and of right size as shown in the figure above .Do erase all the extra lines which will nit be required later .Remember to keep the reference lines faint so that they do not stand out too much later.

Now let’s start rendering the eye ball first .The method we are using here is again the hatching technique.The ball we start giving a medium tone .Remember to use the pencil in slant position and slowly complete it. For the center darkest tone is used so that we can uplift the highlights properly .So, remember to understand these places of highlights and darker tones.As, you are a beginner ,please refer to the figure above for ease of understanding.
As, you proceed also learn to add texture and light tones at the borders in between with your pencils these are just small strokes to give the eye a realistic look .

Moving ahead to the eyebrow,draw the rough lines for understanding the required shape of the eyebrow.For the eyebrows try and use pointed pencil as you will then get proper strokes for the hair you want to show.Always maintain the thickness and shape as you make the strokes as show in the figure.
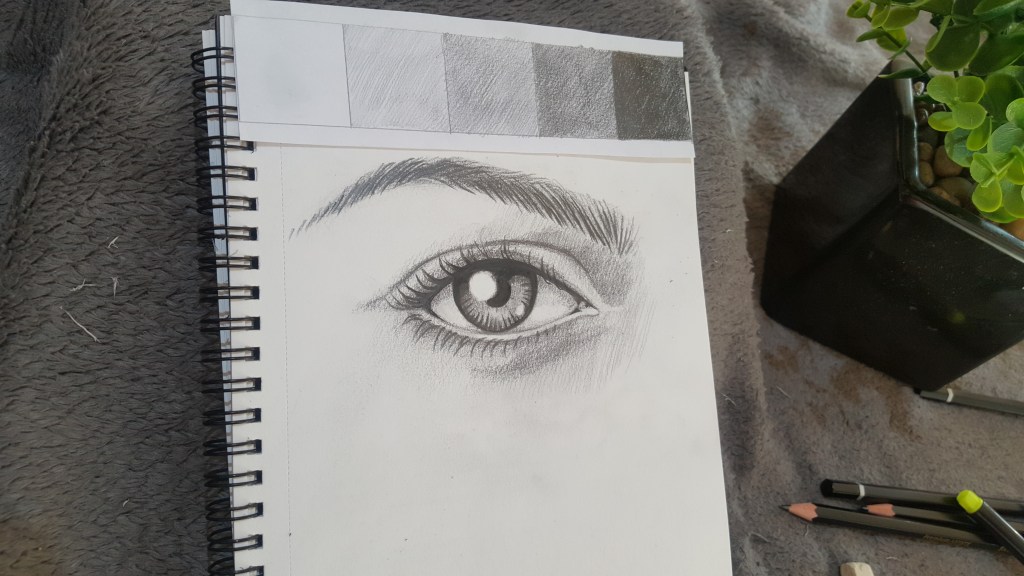
When you start rendering the skin portion around the eye, use lighter tone.Whereas, the places such as the ends of the eye, the skin fold above the eye and the eye lash border keep it dark and thin .Make sure you use pointed pencil and give them a proper thickness required as shown in the figure above.Make sure the strokes of eyelashes are pointed and for correct length .Stay patient and make them as they give the sketch a character .

Every detail in the shading adds to ts realistic appearance ,so never skip any part .As shown above the shade card is given to understand the light,medium,dark shades. So, when you do it you will get an idea as to how much light and dark tones we require .
This technique of hatching in sketching is not only great to try out when you are a beginner but also gives you as easy start to pursue and practice the skill.
Hope you have enjoyed it!
